
Versatility is the name of the game here at Agile-Mercurial. If you can do it with Excel, you should be able to figure out how to do it with Google Sheets. If you can’t figure out how to do it with Excel, check out my tutorials here: Excel VBA Tutorials.
This is a basic introductory/beginner tutorial on how to get started using JavaScript to control your Google Sheets. JavaScript spans the Google Suite, it is Google’s answer to Microsoft’s Office Visual Basic for Applications (VBA). Learning JavaScript can help you with Excel in the future (as well as web development), because eventually, JavaScript will probably become more important to Excel. (You can already get add-ins for Excel 2016 and 2019 to run JavaScript in Excel: Microsoft’s Excel JavaScript API).
For the time being, VBA is what works best in Excel (on Windows computers, not anywhere else) and its counterpart Google Sheets uses JavaScript which can pretty much work anywhere thanks to your web browser. Google Sheets JavaScript has numerous advantages over Excel VBA, but I won’t get into those here; instead, I am just going to show you some basics in Google Sheets.
Creating a script for your sheet
1. Make sure you have a Google Sheet open. On that sheet, go to “Tools” then “Script Editor”. Click “Script Editor”.

This should take you to a new “Untitled Project” with a default tab name of “Code.gs” and an empty function.
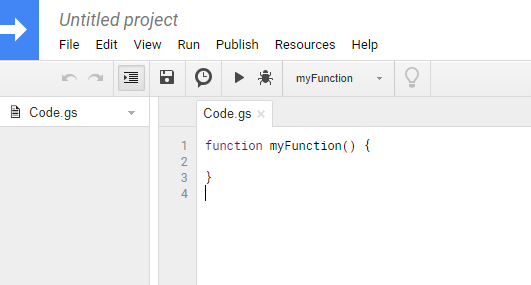
* A function is simply a block of code. The function above has the name “myFunction()”, this will be important to know later when we want to use the code we will put into that block of code.
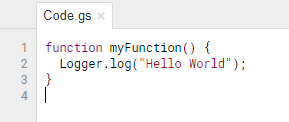
2. Let’s keep it simple at first – add the line ‘Logger.log(“Hello World”);’
Your code should look like the below image after adding
Logger.log("Hello World");
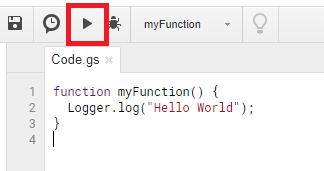
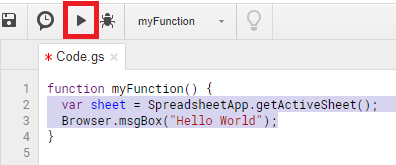
Now you have code that does something. This code writes to the log. You can test it out by pressing the run button in the bar above the code window. It is shaped like a triangle or a play button.
Upon pressing that, if you haven’t saved the script you will be prompted to give it a name and save it.

After doing that, your script should execute the myfunction function. If there is an error in the code, the execution will stop and may give you an error; or it may not and it just doesn’t give you the output you expected. It won’t hurt anything if that happens, you just have to figure out what is wrong and fix it.
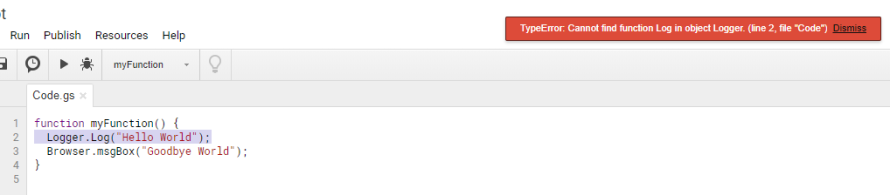
Common things that can go wrong; missing punctuation (like the semi-colon at the end of the line), or as shown in the image below, a capitalization error. I had the word “log” capitalized and that was not a recognized command. The word “log” needs to be lowercase, but “Logger” needs the first letter to be uppercase.
If it ran correctly, we should be able to check the logs and see that “Hello World” was entered. Near the top of the script page, under the script name, is a menubar and in that menubar is a dropdown item called “View”. Under “View” is “Logs”. I want you to click “Logs”.

After clicking “Logs”, you should get the Logs pop-up.

3. Let’s add a pop-up message
If you are familiar with JavaScript outside of Google Sheets, you probably need to forget all of the standard functions. They won’t work, and here alert() isn’t what we want to get a message to pop up on the screen.
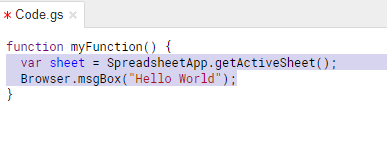
We are going to add two lines. The first line is going to link the code to the active Google Sheet. The second line is going to be the actual pop-up message.
The two lines you are going to place inside of the myFunction function are:
var sheet = SpreadsheetApp.getActiveSheet();
Browser.msgBox("Hello World");

When you are ready, go ahead and click that run button.
The first time it is run, you might have to give it permission to do so. Google will throw some messages at you letting you know what you need to do.
After that, you might notice that your script just keeps running. That is because of your pop-up. Switch to the Google Sheet you used to open up this script page.

If everything worked right, your pop-up is showing on your active Google Sheet.

To end the script execution, click on “Ok” or the “X” in the corner of the pop-up.
4. Add a button your Google Sheet
You can draw a button somewhere else and import it, or you can draw one within Google Sheets and use that. The first step is to make sure that you are on a Google Sheet and not on the scripting or coding page.
Below the name of the Google Sheet is a menubar. Find “Insert” and in the dropdown menu find “Drawing…”.
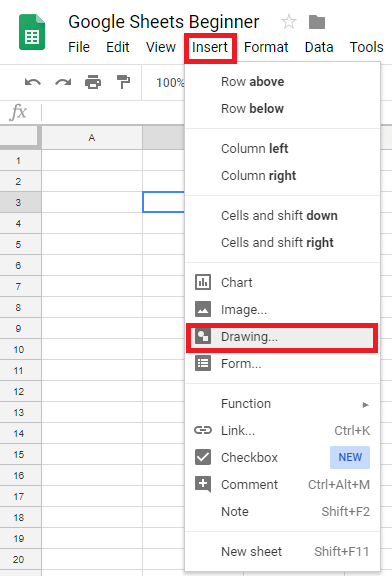
Once you click on “Drawing…” you will be presented with a pad that you can draw with or use it to import images. For this tutorial, I am going to create a simple rectangle.

You simply click and drag the rectangle to the size you want.

To add text to your rectangle, double-click on the rectangle. Play around here, change the font and the color. Try to figure out your limits.
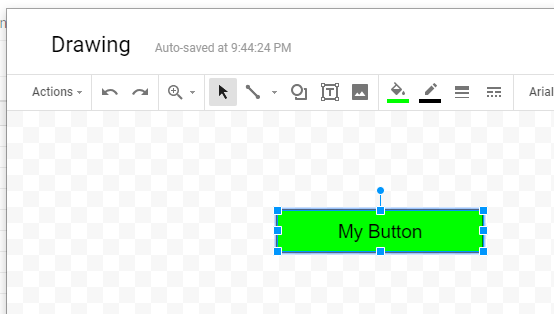
When you have the button formatted how you want it, click the “Save & Close” button on the Drawing pane.
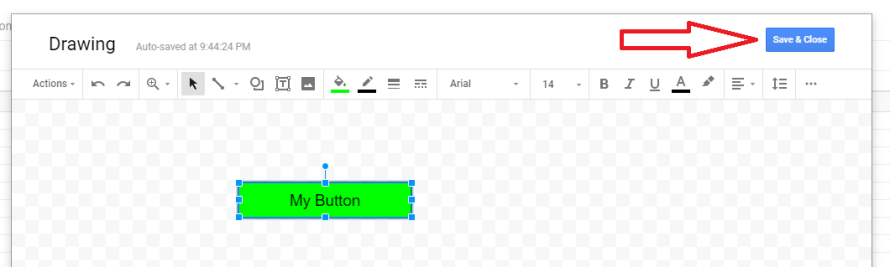
The button should show up on your Google Sheet.

Move your mouse to the button and click on it (*If you already have a script assigned to the button, you have to right-click). There should be 3 dots on the right-hand side of the button (technically, it isn’t a button yet. We have to make it one). Clicking on those 3 dots gives you more options with what to do with your shape/button. We want to “Assign Script…”.
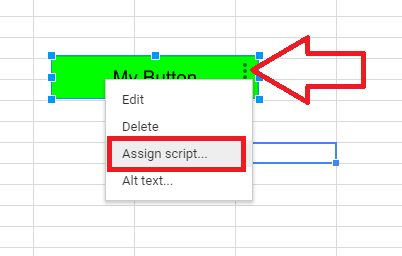
Inside of the prompt that appears after clicking “Assign Script…” enter in “myFunction”. If you recall, myFunction was the name of the function in the script window we were working on earlier. If you haven’t changed it, it should still be set to execute a pop-up that says “Hello World”.
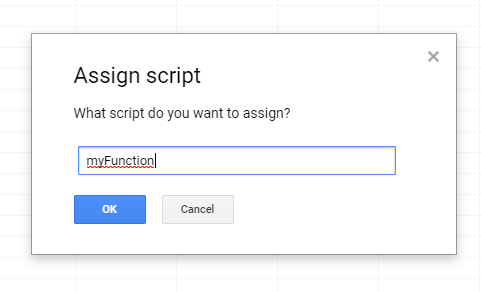
Hit “OK” and you go back to your Google Sheet with your button. That button is now officially a button. When you click on it, it will run your myFunction function. Try it now.
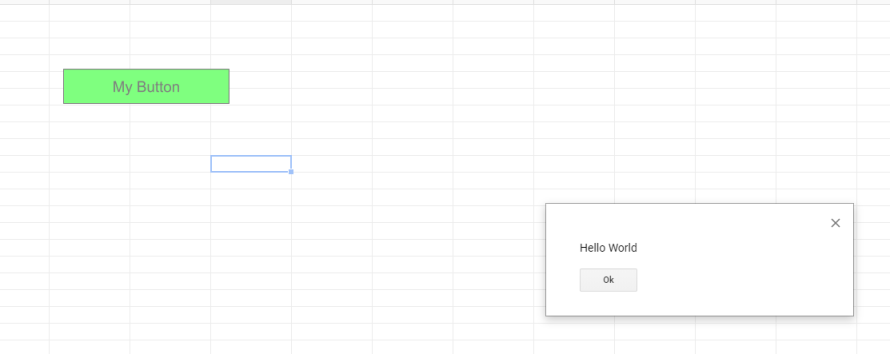
There you have it. The basic instructions for making Google Sheets very functional and very powerful. I hope you enjoyed this tutorial and learned something new. If not, it may be that this was too introductory for you. Stay tuned for more tutorials on Google Sheets.
Share this:

Categories: Google Sheets, Google Suite, Technology, Tutorials


So when you click on the button I assume the dialog box disappears – but it is there a way to keep it active when you press the button? This way it could act like a floating menu. I have a spreadsheet with about 20 sheets and a floating menu may be an easier way to navigate through them
LikeLike
Something like a form? You should actually be able to add in a form that you could use to navigate with several buttons. This method here may not work for you. Under Tools, you should find forms. You may have to code it to display on opening.
LikeLike
Hi
Is there a way to make Two Lines on the MSG Pops Up Like:
Hello every one
Are You Ok
LikeLike
If you do something like:
var sprdSheet = SpreadsheetApp.getUI();
var popupResponse = sprdSheet.alert(“Hello everyone”, “Are You Ok?”, sprdSheet.ButtonSet.YES_NO);
You will get “Hello everyone” as a header for the box, and then the “Are You OK?” as a message in the box with two buttons, a Yes and a No button.
You can then use it like:
if(popupResponse == sprdSheet.ButtonSet.YES){
//Put your code here for what you want to happen if they click yes
}
LikeLike
Hi Lender
I got a message that “sprSheet.alert is not a function
LikeLiked by 1 person
If you copied the variable object name you have a typo. sprdSheet.alert().
LikeLike
var sprdSheet = SpreadsheetApp.getUi();
var popupResponse = sprdSheet.alert(
‘Hello everyone’,
‘Are You Ok?’,
sprdSheet.ButtonSet.YES_NO);
and I had some typos – the above works
LikeLike
You can see it in action here: https://docs.google.com/spreadsheets/d/1UoENvmq5oBRjvoU_TUo9x1ilTfMh6VAAtYXHbqZQl8k/edit?usp=sharing
LikeLike
Code I used to make the sample:
function clickMeButton() {
var sheet = SpreadsheetApp.getActiveSpreadsheet();
var sprdSheet = SpreadsheetApp.getUi();
var popupResponse = sprdSheet.alert(
‘Hello everyone’,
‘Are You Ok?’,
sprdSheet.ButtonSet.YES_NO);
if(popupResponse == sprdSheet.Button.YES){
sheet.getRange(“F4”).setValue(“You say you are fine, that is good”);
}else{
sheet.getRange(“F4”).setValue(“I hope everything gets better for you”);
}
}
LikeLike
Hi Lender
Seems to be that does not accept 2 strings (“”) (“hello”,”Are you OK”)
Sorry for all these questions
LikeLike
It doesn’t, that was a typo on my part:
function clickMeButton() {
var sheet = SpreadsheetApp.getActiveSpreadsheet();
var sprdSheet = SpreadsheetApp.getUi();
var popupResponse = sprdSheet.alert(
‘Hello everyone’,
‘Are You Ok?’,
sprdSheet.ButtonSet.YES_NO);
if(popupResponse == sprdSheet.Button.YES){
sheet.getRange(“F4”).setValue(“You say you are fine, that is good”);
}else{
sheet.getRange(“F4”).setValue(“I hope everything gets better for you”);
}
}
LikeLike
Thanks a lot
It works
LikeLike